
The Longest Panorama
By Hillel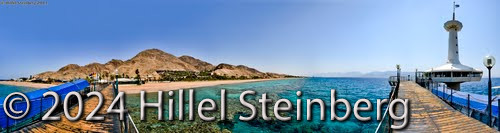
In July of this year (2011), my family took a comprehensive trip to Israel for the grand tour. We hit all the major highlights, and everyone had a blast. I shlepped my Nikon D700 on the trip, and several lenses to cover possibilities. By the flight home, I had taken over 20,000 photos from the southern resort of Eilat, to the Golan Heights in the north.
Many of the photos were actually series. Some series were collected to make sure a particular event was not missed. Some series were performed as bracketed shots which could be later combined to synthesize HDR composites. Other series were bracketed simply to provide a palette of exposure options to choose from later – and thus insurance when capturing a photo opportunity. Still other series were collected for the ultimate purpose of generating stitched panoramas.
The decision to take a photo series for these purposes goes something like this. At some point, a photo opportunity arises. One of the following criterion is identified:
- The timing of the event is tricky – I may miss the perfect moment.
- The scene is static, with too many severe shadows & bright highlights.
- The scene is moving but the optimal exposure for the shot us unclear.
- The widest lens will not capture the static scene with desired detail.
In Israel, when the first situation was detected, I would take a non-bracketed shot with the continuous mode set to high. Many photographers would also choose the camera’s speed-priority mode for the event. I usually didn’t. The thinking goes something like this. If I only fix the speed, the camera can adjust both the aperture and the ISO sensitivity. It will probably open the aperture wide to compensate for a fast shutter. A wide open aperture means a small depth-of-field. Even with continuous-focus on, the photo will appear soft in all but the parts of the scene which lay precisely in the focal plane. The better option is to go manual with both the speed and aperture set. This forces the camera to only play with the ISO sensitivity, and the depth-of-field is now guaranteed. The trick here is to make sure the camera knows which are reasonable values for ISO. I usually set the D700’s sensitivity to play in the 200 – 1600 range where I’m fairly certain noise is limited.
When the second situation was detected, I would take a two, three, five, or seven bracketed shot at separations of 1EV. The thinking is as follows. I have tried bracketed shots at .7EV and .3EV but the exposures aren’t varied enough to make bracketing worth it. If I though that the shot would come out fine, but it might be a tad over exposed, I would shoot a two-bracketed shot with one as-metered (MTR) and one under exposed. If I though the shot was going to be near the optimal exposure, I might do a triple-bracketed shot with one under and one over. For severe situations, say a sunset, I might use a five or seven-bracket shot to form a perfectly exposed HDR photo later providing details for both the highlights and shadows. In some ways, today’s best cameras are still like two-octave pianos – never enough to express the entire piece. You need to improvise.
In the third case, if the exposure is tricky and the scene is changing considerably, an HDR may not be practical. Still, a bracketed three-shot capture may save the day if you think the exposure could be off from the metered one. This works with a moving scene if you set the capture to high-speed continuous mode. On the D700, with the EN-4 batteries you can shoot 8 frames-per-second. If you shoot only three bracketed frames, that’s 3/8th of a second, or less than half of a second for the entire series. This is usually short enough to capture the moment, and still offer several exposures to choose from. For this type of bracketed shot, I select the bracketing order carefully as MTR, UNDER, OVER. The metered shot will have the best chance at matching the optimal exposure, and should be taken first. For under exposed shots I find that I loose color definition, but I still have luminance information for exposure bounded parts of the scene. For over exposed areas, I find that I loose luminance information, but I still have a bit of color information to work with. For skies, where most of the blow-outs occur, I would rather an under-exposed shot because the cloud luminance is key, and I can provide any missing coloring detail for it in Photoshop later.
Finally, if the scene is expansive, I may not be able to capture it in a single shot. I need to capture a panorama. In this case I don’t have to bracket the shot, and I don’t want to be in a high-speed continuous shooting mode. Instead, I set the shooting mode to single, turn off the bracketing, and fix the aperture at a high value. Fixing the aperture at a high value is important for two reasons. It has to be fixed so that the depth-of-field between overlapping pictures is identical. And, a high aperture value (small opening) is desirable because you want as much of the panorama to be in focus as is possible. Parts of the scene which are not in focus cannot be stitched automatically.
But, there is a fifth case. On the final day of the grand Israel trip, our family took a one hour boat ride from the ancient port in Jaffa to waters off the Tel-Aviv coast in the Mediterranean Sea. For the first half hour we journeyed northwest towards a beautiful sunset. I took many bracketed shots to make sure these moments were captured, but the scene wasn’t static as the boat rose and dipped over waves. Because the sun dominated the shots, I didn’t worry that the speed for these shots was set high. After a bit we turned around and headed back towards Jaffa. The coastline up ahead was clearly lit by the sun low on the horizon. I noticed that I could see the entire Tel-Aviv and Jaffa coastline from this fortuitous vantage point. No single picture could capture this moment, except for maybe a fisheye shot – but the detail in these exotic photos are often lacking. Instead I though about taking a panorama.
Normally I shorten the focal length all the way, and try to stitch a panorama in as few shots as possible, overlapping about 20-40% as I travel from left to right in the camera’s portrait orientation. Here, if I zoomed out with the 28 – 300mm lens I was using, I could probably capture this panorama in about five pictures. What I would capture if I did this would be mostly the sea, with a tiny coastline in the distance. But the only thing interesting in the scene was really the coastline itself. The sky and sea were fairly plain since it was clear, and we were headed away from the sun. Also, the surf in front of the boat would never stitch properly between even nearly successive shots. But I had some questions. Even with the camera lens vibration reduction on, could the coastline be captured without blur? How many pictures would it take for the whole coastline panorama? Could I consistently frame each shot while bobbing on the boat? How easily would the results stitch later?
I set the D700 to manual, and moved the aperture to 8.0. This narrow aperture would make sure the coastline would be in focus. I moved the focal length all the way to 300mm and verified that this was the right length to capture the beach and buildings along the shore. The shooting mode was set to single so each shutter press would not start a burst. I then fixed the speed at 1/350th of a second. I wanted to go higher, but I was afraid the light would not be sufficient to capture the shadows if I went higher. I figured with the VR, the coastline structures would be sharp enough to stitch later. I kept the white balance setting fixed at “cloudy”. Though there wasn’t a cloud in the sky, this setting works well across nearly all outdoor occasions with Nikon cameras. Furthermore, the white balance needs to be fixed between shots so coloring is consistent between neighboring frames. To begin the panorama, I started from the left (northern Tel-Aviv) in the portrait position. I first pressed the shutter halfway down to focus on the distant shoreline. Given that nearly everything but the ISO was fixed at this point, I was fairly certain that stitching would be possible later. I took the entire panorama quickly, and never fully released the shutter to maintain consistent focus and lighting across the panorama.
After taking the panorama, I promptly forgot about it. The trip’s end was near, and there were many logistical things to consider the next day. Several months later, I began to work chronologically through the 20,o00+ pictures looking for a variety of photos to submit to my website as well as Google Earth. Weeks later, I started through the last few series of pictures which included the long coastline panorama. When I came to the coastline series (40 images), I simply ignored it and continued on, thinking it would not be worth my time. But, this was the last batch of photos, and I came back to the series soon after. The photos looked a lot clearer than I thought they would be. I decided to stitch them and see how it went. The software I was using did a good job, and only got confused in one section of the coast where part of the scene looked similar to another frame in a completely different coastal section. I fixed this and rendered the results.
I loaded the stitched product into Photoshop and examined it. There were only a few issues left to deal with, but none of these were related to the stitching. I had darker areas at the edges of the picture which needed to be lightened. I also needed to remove a few circles in the plain sky which were caused by small particles of dust on the D700’s full-frame sensor. For good measure, I added my copyright line in the bottom left.
Google currently has limitations on photos you submit to them. The total size cannot be more than 25mb, and the total number of pixels cannot exceed 50mp. Normally, these constraints are very reasonable. But, in the case of a monster panorama, these restrictions must be confronted. After I saved the high-resolution product, I first shrunk the image till the 50mp constraint was met. Then I saved the image as a JPEG as quality 12, the highest setting allowed. The results were too large as expected. I lowered the quality setting one value at a time till the 25mb constraint was met. I uploaded the results to Google, mapped the location, and tagged the panorama with the relevant keywords. The submission was accepted to Google Earth 24 hours later.
The results are not perfect, but the panorama is truly a one-of-a-kind. Because of the aspect ratio, the Google thumbnail looks strange – a single horizontal strip so thin you cannot discern its contents until you see more detail. The easiest way to actually view the image is to download the high-resolution version first and preview it locally on your computer. The entire panorama cannot really be viewed usefully on a single monitor. Instead you can pan left and right along the vertically-fit coastline and get a sense of the panorama as a whole. It’s remarkably long. Just when you think it will end, it does not. All key parts of the Tel-Aviv and Jaffa coastline are present.
If I had to do it again, It is likely I would change little. Furthermore, I might try this technique in other similar situations. This fifth scenario is thus identified as follows:
- You observe a long stretch of interesting horizontal scenery.
- The scene is static but you don’t have to be.
- The lighting is similar across the panorama.
- Very little outside the horizontal scenery is interesting enough to be part of the final product.
The last criterion is key. If it weren’t for #4, the panorama could be stitched in fewer shots, and with a wider aperture. Below is a thumbnail which shows the final product. If you click on the thumbnail, it will take you to Google’s Panoramio, where you can inspect the panorama in higher detail. On Panoramio, you can see that this particular image has already been selected for Google Earth. Feel free to try this approach for yourself. If you do, send me an email so I can be sure to check it out!

[whohit]-LONGESTPANORAMA-[/whohit]
Post a Comment
You must be logged in to post a comment.