
To Edit or Not to Edit, That is the Question
By Hillel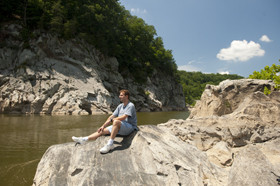
I’m often asked to take pictures for a special event. At some point later, I’m requested politely to just send the pictures to an email address “when I can”. I don’t have a quick answer for this, so I’m writing this BLOG entry to address what looks like a straight-forward request… but isn’t. The short answer is that there is much more to professional shooting than most think. For this discussion, I’m going to assume “Frank” is asking for the pictures. Below is a summary of the reasons why Frank will probably not get the pictures in an email. Let’s begin.
We start at the onset of an event. I don’t “take” pictures. Instead, I begin my “photography workflow”. In order for me to respond to Frank’s question, he must first understand my “workflow” and the resulting products. This process formally begins when I adjust the camera’s settings and configuration (I’m not going to include the part about how I ended up at the event with configured equipment totaling thousands of dollars, batteries that are full, and flash cards that are empty). On the Nikon D700, I shoot in 14-bit raw to capture as much as the camera can see without alteration or loss. I may set the camera in Aperture priority mode if I am concerned with focus. I may set the camera mode to Speed priority if I’m concerned with minimizing or maximizing blur. But, mostly, I prefer manual mode. That is, I guess what aperture would be good for a shot, I guess the speed at which the shot should be taken, and I then make sure the current ISO sensitivity range will work with the chosen aperture/speed combination. I may put the shutter in “continuous shutter” mode for action shots and bracketed exposures. I may change the camera to “continuous focus” if the subject is constantly changing it’s distance to the camera.
After I choose the right lens for the setting, I need to make sure that it’s focus switch is set to automatic, and that the camera’s DOF correction is working so the pre-calibrated lens won’t produce back-focused or front-focused images. If the outer lens filter is dusty, I clean it with a blower and brush. If the shot is to be taken outside in bright light, I need to make sure the hood is on and aligned properly to avoid unwanted lens-flare. If I think the flash will fire because I’m inside, or it’s a dark scene, I need to manually pop the flash, or add the SB-600 or SB-800 Speedlight attachments to provide the required background and foreground light. If the hood is still on, I remove it, or simply flip it around backwards so it doesn’t block any of the light from the flash.
I can choose to use the flash’s built-in diffuser if I want to spread the light out the bit. I can also raise the flash’s built-in white card to force the light forward. I can even change which way the flash faces to direct the light or even bounce it off a wall and/or ceiling for dramatic effect. When the built-in optional flash diffuser isn’t enough, I can add a diffuser dome to spread the light more uniformly around the scene. Domes can have caps applied or not to produce different effects. Caps can be white or yellow to change the lighting color balance. Decisions need to be made. Do I bump up the flash’s output +1 EV or take it down a notch with -1 EV? Do I pre-focus on a part of the scene and then recompose? Do I need to pre-calibrate the white balance first by taking a shot of a white piece of paper or gray card? Is the subject smiling? What is behind the subject? Is there a better spot to take the shot? How will the final image be cropped for print? Etc.
Once the shot is taken, my “workflow” process continues at my studio. Given that I have a Nikon camera, the result of each RAW shot is a Nikon-formatted NEF file. These 12+ megapixel images are losslessly compressed by the camera to about, say, 5 megabytes. Keeping NEF files for the long-run is risky because Nikon can change their format in the future (and drop legacy support without notice), so my “workflow” continues with an import phase where the photos are first converted to Adobe’s image archive format (DNG) for long-term storage. Using the DNG format, I get the best of both worlds. I get the flexibility of keeping the RAW source data coupled with Adobe’s guarantee for future support. During the import process, the files are renamed for better clarity and indexing. As an example, the photo “IMAGE_7395.NEF” might become “Adam_Bar_Mitzvah_Party_0001.DNG”. The images are automatically placed in a directory that is similarly named but with the date applied on the left, e.g.: “20111022_Adam_Bar_Mitzvah_Party”. This way I can see the directories in chronological order, but I can also find out the event name by simply looking at the directory list. Although Adobe provides advanced search capabilities without requiring changes to the file and directory names using the built-in DNG metadata, I like to name the directories and files so I can do this even if I move the data elsewhere – where Adobe isn’t there to help. During this process, my name, contact information, and copyright information are also supplied to the DNG so that any product that is made in the future from these files will have the author’s information attached.
I have the files on the computer now, so I could just send them to Frank, Right? Nope. First of all, just two pictures together would require around 11 megabytes. Current mail transmission protocols don’t send “binary” files directly without “encoding” them first. The encoding process adds bulk to the files which would increase the final size to, say, 16mb. Most mail servers will reject email with large attachments (e.g., greater than 15mb). Even if Frank’s mail server accepts large attachments, I don’t think he would like me to fill up his email box. There is really nothing he could with a DNG file anyway. What he probably wants are JPG or TIFF files which can easily be read by most PC and MAC applications or printing stores. Finally, the pictures are not ready for distribution yet. Not if you are a professional. Ok, on with the workflow.

There is no point in going any further without calibrating your monitors. Huh? Put it this way. When you take a shot, the camera collects color information using specialized sensors. When it comes time for the camera to store a pixel’s color, it needs to decide how to “describe” it as digital data. This is done using a color “profile”. Different color profiles are good for different purposes. Some color profiles are good for printing. Others are good for display. These color profiles are important to photographers because without them, each device could not agree upon the exact interpretation of the digital color data. The camera might interpret the colors one way, but a display which doesn’t find the camera’s color profile will not be able to display the image the way the camera sees it without this information. To make sure that your display and its profile match, you need specialize equipment. Until then, red isn’t red. It’s just reddish.
I use the Spyder Elite sensor from Datacolor to calibrate the screen and produce a custom profile for it. Photoshop will then know how to display image data accurately by resolving the differences between the camera’s digital profile and the display’s profile. To use the Spyder Elite, I turn on only the lights in the room that will be on during the editing process and I close the shades. I then place the sensor over the center of each screen (I use two landscape monitors side-by-side for editing), and run the special color calibration software. The calibration software forces each monitor to display many shades of the primary light colors and grays. Meanwhile, the sensor in the device picks up the resulting color, and records its findings in a calibration profile. When all relevant primary colors and grays have been tested, the calibration file will have enough information to map incoming digital camera color data into the precise colors needed to replicate them accurately on the display. The same technique can be applied to printers in order to produce similar calibration files. Only when the screens have been calibrated, does the workflow continue. Color profiles need to be recalibrated at least once a month so each workflow device is ready to interpret color in an accurate and reliable way.
We’ll worry about how to get Frank the pictures later. But, keep in mind, I need to give him something he can use – we’ll assume JPEG (Joint Photographic Experts Group) formatted images for now. So, what’s the next step in the workflow? Simple. I identify which pictures I want to consider as candidates for the final product. What? You don’t want to just give them all to Frank? No, actually I don’t. Many of these photos will not make it through this process to Frank. As you will see, there are many reasons why images are rejected. I begin the selection process by first using Adobe’s Bridge application to make a sub-directory named “Candidates”. I then review the source DNG files in Bridge and evaluate each one across a variety of criterion. Often at this point, many of the pictures I though were perfect upon taking them are in fact unusable. This can happen if the subject is not in focus. It can happen because something is cropped from the picture that is essential. It can happen because the composition is good, but there is an artifact that can’t be easily removed – and is what I call a “show-stopper”. Here’s a good example: I have a closeup of a smiling child with good lighting and composition – only in the background, there is a man bent over tying his shoes with his rear to the camera. If I can’t fix it, there’s no other choice but to reject it. I use Bridge to copy the promising raw DNG files into the new candidate sub directory. Frank might ask why I don’t just give all the candidate photos to him? The answer to this is – I can’t, because they haven’t been “developed” yet. And, each picture is a reflection of my work. I’m an author when I do serious photography. And, authors generally don’t release their work till they have been developed, refined, and edited. Serious artists don’t give away their rough sketches until they have been painted. Likewise, each product I create is a reflection of my work. There are few exceptions for the professional. Maybe, say, if I’m posting to Facebook.
When I’m done selecting candidates, I move on to the next phase – the raw editing phase. I could just use Photoshop to make edits directly at this point, but there is an advantage to using Adobe’s Camera Raw editing software first. Remember, at this point I haven’t really altered the source data captured by the camera. As I process pictures in Photoshop later, the majority of the image operations cannot be completely reversed later. For example, if I decide to blur an area in Photoshop, I can’t sharpen it back the way it was because the blur operation is a “lossy” operation. The Camera Raw procedure avoids this pitfall by using a simple trick. First, the “Camera Raw” procedure does not alter the original file. For example, if I decide to crop an image, the image isn’t affected. Instead, a “note” is made that simply records the portion of the image I’m interested in. I can change the cropped area later without loss because only the “note” will need to be updated. And, if I decide to brighten an image, the image again isn’t actually modified. Instead, a “note” is made which identifies how much the colors should be brightened. Each “Camera Raw” operation can be changed later, because they are reapplied “virtually” to the original image. But, Camera Raw operations are limited for this reason. The results of the Camera Raw process are, however, sufficient to determine whether each candidate will make it to the final editing phase.
The original images are 14 bits for each component (Red, Green, Blue), but many output image formats only support 8 bits. At this point, it’s important not to loose any of the data, so Camera Raw has to be instructed to open and edit the pictures in its 16 bits mode. If not, it will reduce the 14 bits to 8 bits and image quality will be reduced before we have left the starting line. These extra bits can help resolve shadows and highlights, and will give the image a larger sandbox to play in as it is edited later.
Using the Camera Raw software, I concentrate on several types of high-level adjustments to the image. First, I crop the image to increase the compositional value of the subject. When I do this, I maintain the aspect ratio 2:3 which is the original ratio of the Nikon image. I then fix the lens distortion of the image so that straight lines appear straight. Most people don’t realize that nearly every lens and body combination produces at least one or more types of optical distortion at different focal lengths. The exposure, contrast, fill light, blacks, and clarity of the picture are adjusted next. The white balance can be altered to make the picture cooler or warmer. When there is sufficient noise in the image, it can be reduced using the luminosity and color noise reduction controls. Dark areas can be lightened, and light areas can be darken. Other changes can be made to fix lens vignetting, correct specific color ranges, and eliminate red-eye. Because many pictures may require the same tweaks, I often apply some of the changes to more than one picture at a time which Camera Raw lets you do. Finally, when I’m done, I’m ready to load the first “Raw” processed candidate in Photoshop for more detailed editing. When I do this, the raw image remains untouched, and all the Camera Raw directives are used to create a temporary composite picture to work with in Photoshop. Though it would be nice to stay in “Camera Raw” for the remainder of the workflow, “Camera Raw” editing is limited, and cannot perform complex iterative operations in a sequence, nor does it provide for layering and other essential processing techniques.
At this point, Frank is wondering what I could possibly do in Photoshop that I haven’t already done. The answer: If you are a professional photographer, plenty. Though the picture has compositional promise at this point, and it’s colors, distortion, noise, exposure, and clarity are within a reasonable range, there are many things that can be fixed to make a good picture near perfect. As the workflow continues, the choices become more subjective, though, and the techniques start to resemble “art” more than “science”.
Thus, here is where photographers tend to diverge in their thinking. Some photographers only consider changes at this point to correct mistakes made by the operator/camera during the shot. For example: removal of spots from dust on the camera’s sensor, lens flare, flash reflections, red-eye, and shadows accidentally created by the lens hood. Some photographers, like me, do not stop here. To understand why one would consider altering the shot, one has to first understand that even the raw shot is an “interpretation”.
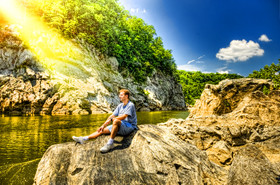
When the camera takes a shot with its specific settings, the resulting image is an “interpretation” of a 3D scene as a 2D image at a precise point in time. When we look at a subject, what we don’t realize is that our eyes are continuously changing their parameters as they sample the world around us. Our eyes are perpetually refocusing, adjusting the amount of light in the scene, and our brains are deciphering the incoming video stream using a variable set of algorithms. Likewise, a single RAW image reflects a specific focus point, a specific DOF, a specific light sensitivity, a specific shutter speed, and a specific set of color interpretations by the camera. Often, when I look at the RAW image later on my calibrated screen, the image doesn’t even appear close to what I thought I witnessed at the time. And, it probably wasn’t. That was simply the camera’s interpretation. Thus, if we are already “interpreting” the scene with our cameras, why stop there. Pictures are taken for a reason. I try to only take shots that tell a story. For example, if I have a well composed photo of a group of people lifting two adults in chairs at their wedding, then the viewer will immediately sense the celebratory mood created by the image. This can easily be ruined by: trash left on the dance floor, a “foot” entering into the scene on the left, and electrical outlet on the floor, and a person walking into a bathroom in the back. It’s not that these things weren’t there in the scene at the time. It’s that each of these elements detracts from the overall sense the viewer feels when discovering the scene for the first time. If you had been there, you too would have filtered out these irrelevant elements. In my view, each good picture should tell a story, and they should do so without unnecessary distractions.
We often don’t realize, but we come to expect this extra level of refinement in many of the things we are presented in our daily lives. For example, during conversations with our family and friends, we often pause, make mistakes, burp, and even leave sentences unfinished. In books, how often does this happen? Not often, because these stories have been refined and edited to their essentials – unless you are Stephen King – just kidding, I love you man! Mistakes that are relevant to the story are left in, but other distractions are tossed out, or never added in the first place. And, stories are better without these “realistic” but irrelevant details. This blog, while far from perfect, has been edited quite extensively, and readers would surely go elsewhere if it were otherwise. With this in mind, each photographer decides how far they are willing to go. And, how much time they want to spend in this final editing phase. Oh, and “compensation” helps too.
Now, during this editing process, we are no longer operating in RAW, but we still don’t want to loose image quality and information each time we open, edit, and save images. Thus, when a camera raw photo is edited further at this stage in the workflow, the intermediate results are saved in Photoshop’s PSD format which is lossless for both image quality and information. Still, many operations cannot be undone, and there are rules to the order in which elements in the scene should be fixed. For example, localized operations (e.g. blemish removal) usually are performed before whole image operations (e.g. sharpen). Operations that only need to be performed on part of the image can be restricted using the selection tool. Simple operations like sharpen are not as good as, say, the unsharp mask which allows the user to fine-tune which elements get sharpened, and which do not.
If an operation in Photoshop may need to be undone later, it can be accommodated by using smart-objects. Smart-objects can have their filters adjusted later because like “camera raw”, they do not change the image directly. But, many filters cannot be performed on smart-objects. And, that’s where layers come in. If an irreversible operation is to be performed, a duplicate layer can be made before the operation is executed. Then, if part or of the image needs to have the effect undone, it is a simple matter to add a layer mask and have the original underlying layer “show through” in that area.
The editing process continues for professional photographers until the editor feels the picture cannot be improved further without exceeding the time they are willing to spend on the task. Again Frank asks: “Can I have the pictures now?”. Well, no. They are in PSD format, right? Frank doesn’t have Photoshop, and really needs the images in a format he can use, say JPEG. But, JPEG is a lossy format. If the final images are converted directly to JPEG, there is information that will be forever lost. If the image needs to be retouched later, the edited picture cannot be completely recovered by reversing the JPEG to a PSD. So, at this stage in the workflow, a batch job can be scheduled to convert the entire final set of images to the JPEG format in a separate directory – leaving the original PSD images intact. When saving to JPEG format, there are options for specifying how “lossy” the image compression should be. Here, the trade-off is between image quality and image size. Professional photographers usually choose the highest quality setting (12 in Photoshop). During this batch phase, other operations can be performed to. For example, during the conversion, the images can be resized, sharpened, and/or have the author’s watermarks added.
Ok, Frank, we are nearing the end. We now have about 300 megabytes of JPEG images in a directory. But, what are you going to do with them? If Frank just needs to print them, I could upload them to a digital processing website (e.g., SnapFish) and he could have them printed if he has an account. But, here lies the rub. If he wants them printed, he may want some 4x6s, 5x7s, and a few 8x10s. I doubt Frank realizes at this point that the images are all cropped to a 2:3 ratio. To print at anything other than a 2:3 ratio, some part of the top or sides will have to be cropped first. The printing sites can do this for him, but he needs to realize this may alter the photo’s composition. This is like watching a high-definition widescreen presentation on an old 4:3 TV. Something will be lost in the translation.
Maybe Frank doesn’t care. Maybe he just wants the prints for display on his home computer. Still, there are lots of ways I can give him the data. I can burn a disc (CD if under 700MB, DVD if under 4.38GB, DVD DL if under 7.96GB, or a single layered Blueray Disc if under 23.866GB), but I’ll have to label it and get him the disc somehow. He could stop by and I could lend him the flash drive (easier for me), but I will need him to return the flash drive at some point later. I could also upload the pictures to my website. This will take a bit of time, effort, and storage on my site. And, if I do it this way, I’ll have to send Frank information in an Email telling him how to get the data. He may have a hard time downloading all the pictures at once, and there may be a lot of images to download. If Frank does download the images, he does need to know that they will be in a 2:3 aspect ratio, and will vary in dimensions. They will most likely be too large for direct display on most facebook accounts and websites, and will have to be resized and saved at a lower compression quality before he can use them in this way. Finally, I could print the pictures or make a slideshow movie with them. If I deliver either of these products to Frank, he may be happy in the short term, but in the long run, Frank may want different products or print sizes later – and he won’t be able to do that with just the slideshow or movie to start with.
Finally, I could invest in a subscription to a photographer web service where clients can download or print the pictures directly. This way Frank could download or print images at my discretion and profit. But these services generally have a yearly fee associated with them, and I will have to pass on these costs to poor Frank. If Frank isn’t good with computers, or doesn’t even own one, this option may not work out. This final stage in the workflow will depend on Frank and possibly on any prior agreement he has with the photographer, and that would be – me.
A typical Bar-Mitzvah or wedding can produce between 1400 to 2000 images. When pruned down, only 400 to 700 pictures may make the cut. It takes a long time to select and move 500 images through this process. I’m sure that there are plenty of Photographers willing to do less for more. But, in the end, good work doesn’t come cheap or quickly. Folks like Frank need to know that if they want some quick pictures in an email, their favorite Uncle Buck with his point-n-shoot will do fine. If they are looking at capturing the majority of the good moments in a four hour event hosted in a dark room with large numbers of moving subjects of all ages – they may want a “professional” photographer. And what is a “professional” photographer? It isn’t the degree. It’s partially about equipment and experience. But, mostly its simply a person willing to go through the entire workflow outline above without taking shortcuts!
[whohit]-TOEDIT-[/whohit]
Post a Comment
You must be logged in to post a comment.