

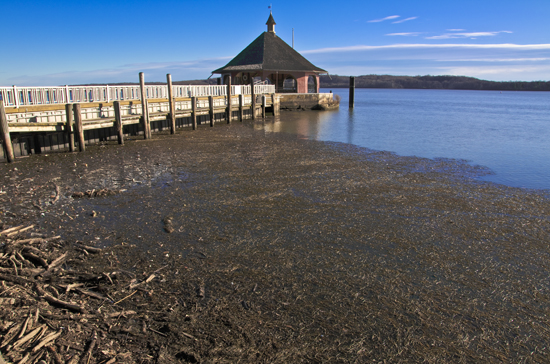
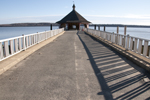
DSLR cameras have come a long way. Dark and bright situations can be captured better than ever before. Because cameras have gotten smarter, you wouldn’t know by looking at many of the pictures taken that they have significant limitations. One considerable limitation of today’s cameras is their dynamic range. They can capture scenes will with highlights or shadows… but usually not both. At least not well. The scene taken above is an example of a scene which confronts this limitation. No combination of settings for the D300 could capture the dock, water, and sky in the scene with all of their detail clearly visible. In order to create a photo with a high dynamic range, one needs to get creative. The following page explains how to create an HDR (High Dynamic Range) photo and overcome one of the camera’s limitation.
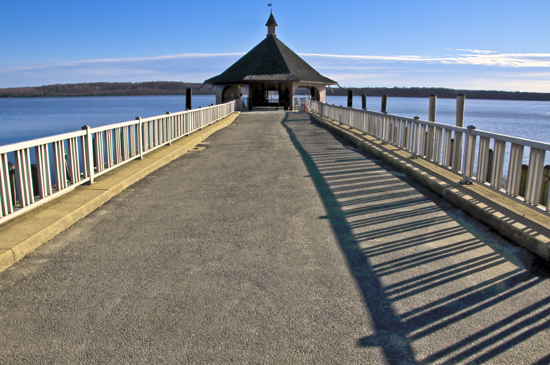
To create an image with a HDR (High Dynamic Range), you need to take several snapshots of the same scene without moving. The above image was created from three separate photos. The first photo was taken with normal exposure settings. The second and third photos were taken with exposure settings of -1.0ev and +1.0ev respectively. The second photo was underexposed by an exposure value of 1.0ev, which is roughly twice as dark as the normal shot. The third photo was overexposed by the same amount. These three pictures were combined in Photoshop to produce a high resolution 32-bit-per-component image using the HDR merge tool. Photoshop uses the overexposed image to fill in detail for the shadows. The underexposed image is used to fill in detail for the highlights. The generated image captures the dynamic range of exposure throughout the image, but has too much component resolution, and cannot be displayed on screens or printers correctly. To fix this, we have more work to do.
The combined HDR image has 32 bits of resolution per component (red, green, blue). Images displayed on the screen and printers at this resolution are not rendered correctly. To fix this, we need to lower the 32 bit resolution image to a 16 or 8 bit resolution. Because we are loosing resolution, we need to make sure the new image represents as much of the high resolution range as possible. A tool in Photoshop called the “Local Adaptation” HDR conversion tool does this, and allows you to adjust a variety of parameters to control the process. The tool’s histogram can be used, for example, to capture the majority of the range being used. By adjusting the shape of the histogram curve, some tones can be given accentuated over others. The final result is a normal component resolution photo with a higher than normal dynamic range for the given scene and the camera’s capabilities. Because the images is created from more than one source image, objects that have moved in the scene between frames must be fixed with other tools (clone brush, spot removal, etc). Taking the photos with different exposures quickly will eliminate much of the work in this final step.