If your subject is small enough, and you want a photo of it in isolation, it would be handy to have a miniature photo studio. Luckily, if you don’t have one, they are easy enough to build. The idea is simple. In order to get a good photo of an object in isolation, you need to make sure that the lighting isn’t harsh and the background color is a consistent.
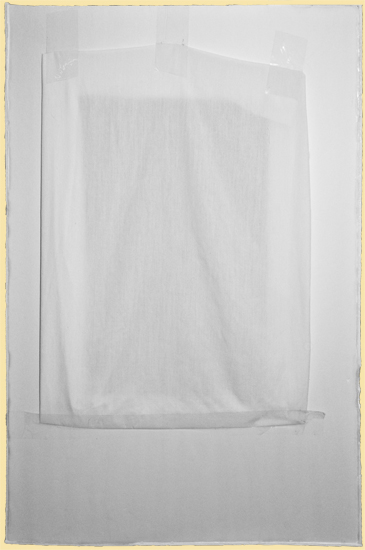
Because the subject is small, it will be captured in high detail. As a result, harsh lighting could ruin the quality of the results, especially if the object has shiny surfaces. And, if there are reflective surfaces, it is important that the reflections don’t include you or the studio. To avoid these issues, a regular cube can be constructed to enclose the subject with translucent windows to diffuse incoming lighting. For the Light Box construction in this exercise, an old
white pillowcase will suffice as the material for the light diffusing element. The box can be constructed of any light material that sports the
background color you are looking for. In this case, both the box and the pillowcase are white because it is a common color which will not conflict with the edges of the subject we are photographing. The box material is made from a thick poster-board which is both durable and light. Having the box light makes the miniature studio portable which is an added bonus.
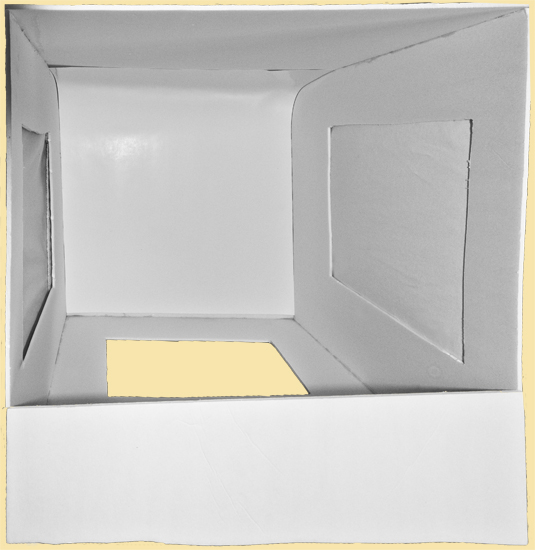
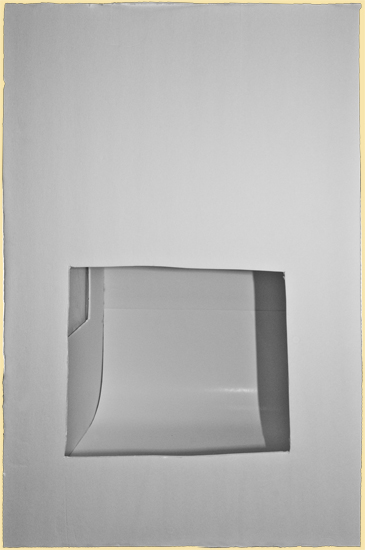
Because the box has edges, taking a picture of the object directly in the bottom of the box will not yield the results we are looking for. To make sure the background of the image is a consistent white color, a large sheet of white poster paper is inserted into the bottom of the box. The poster paper is long enough to cover the entire bottom of the box, and ride up the side as well. In this way, the background below the object and behind the subject are consistently colored. The constructed box is shown next.
Below are images of the constructed miniature studio. From the top, the two side panels with the translucent windows are visible. The front is open, and the poster paper lines the bottom and back. From the front, the small opening is just large enough to place an object inside, and photograph it. The side view shows the pillowcase material, and this is where a bright halogen lamp is placed to illuminate the subject inside. The material will diffuse the light a prevent harsh reflections on the subject. Warning: Do not place the lamp too close to the window material, or will risk a fire as halogen lamps get quite hot.
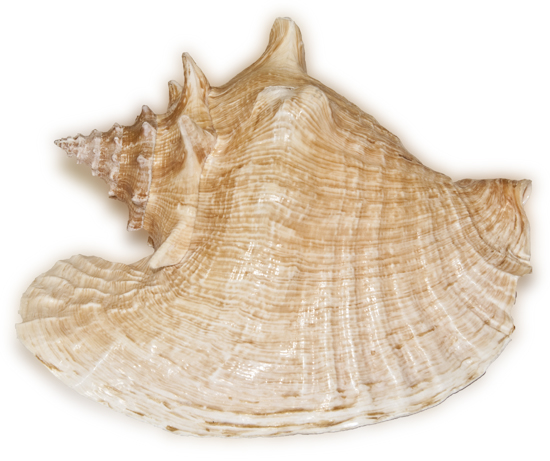
An example product of the miniature studio is shown below.
Because the poster paper forms a continuous white background behind the shell, it is easy in Photoshop to extract both the shell and it’s shadow from the photo. Using a Gaussian blur filter, the shadow can be softened to look more natural. The result of this process is shown below. Images created using light boxes are often used in product brochures because they depict the subject clearly with significant detail and little distraction.